# Connect the Hydrom to Brewfather
{% hint style="success" %}
**Prerequisite:**
1. **Access to user interface**\
To make this setting, you must have access to the user interface. If this is not the case, see here how to do it:[access-to-the-user-interface](https://instruction.hydrom.io/readme/access-to-the-user-interface "mention")
2. **Brewfather user account available**.\
An account has been created with the cloud provider Brewfather.
3. **Brewfather App was downloaded**.\
{% endhint %}
## Add the hydrom to the Brewfather
### Activate "iSpindel"
Open the Brewfather app and navigate to the settings. There you activate the device "iSpindel".\
Unfortunately, the detour must still go as long as the Hydrom is not natively supported.. I am in close exchange with the founder, that this grievance will be removed as soon as possible.

### Copy BrewFather Path
To copy the Brewfather link you can either copy the path (1) or use the copy function (2)

## Insert BrewFather settings in Hydrom
Now open the user interface of the Hydrom, in the best case the Hydrom is already in the network and can be easily accessed via Webpage.\
If there are questions about how to get to the user interface, the following page is recommended: [access-to-the-user-interface](https://instruction.hydrom.io/readme/access-to-the-user-interface "mention")
Otherwise the Hydrom must still be started.
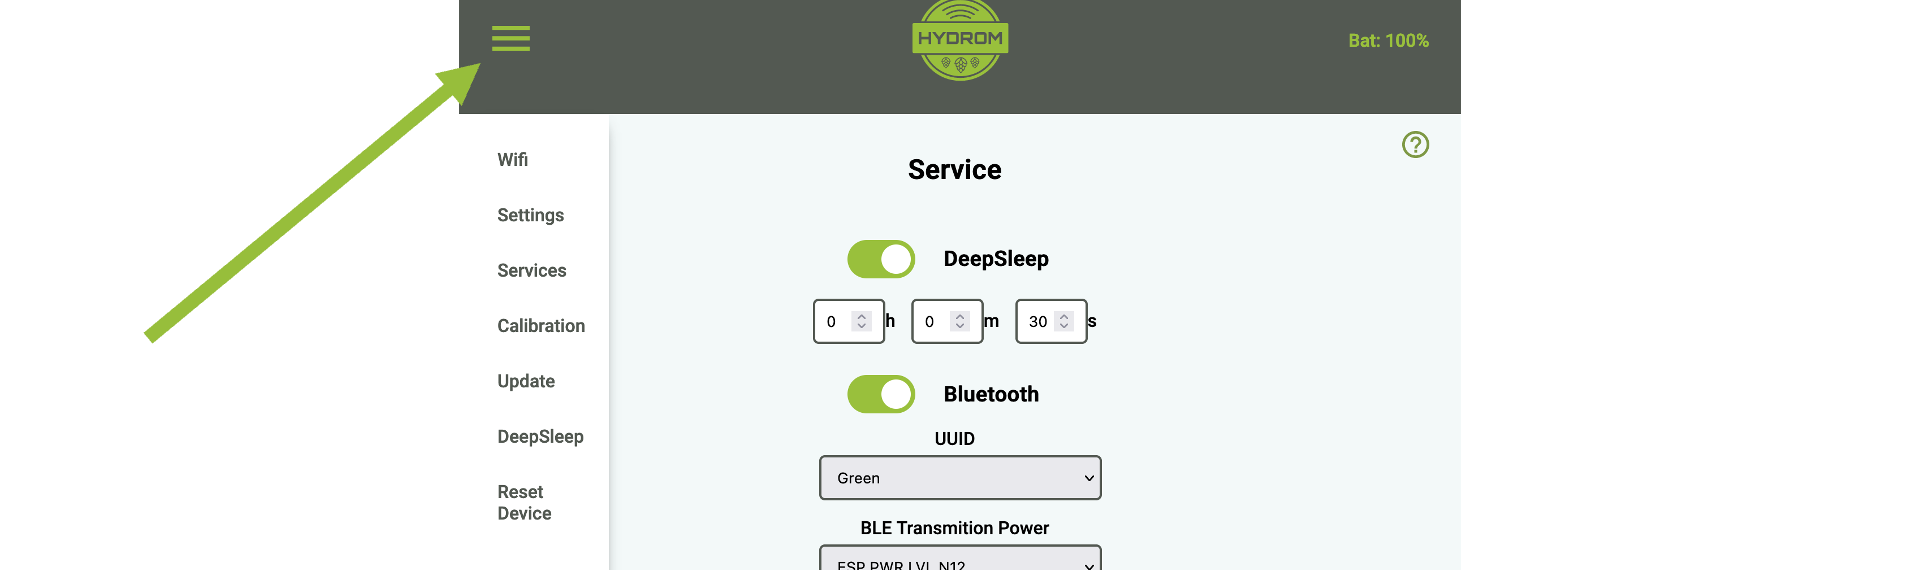
## Step 1: Open the Menue
To access the menu bar you have to click on the three lines in the upper left corner. (See arrow)\
Then the menu bar will open.
## Step 2: Select "Service"
The "Services" page is a resource that allows users to select and configure various interfaces and cloud services for use with their system. On this page, users can choose from three different interfaces - HTTP, MQTT, and TCP - and several cloud services, and then activate and parameterize these options to suit their needs. This page is a useful tool for those who want to connect their system to the cloud or other external services and customize the way in which data is transmitted and received. With the options available on the "Services" page, users can tailor their system to meet their specific requirements and ensure that it is able to communicate effectively with other devices and systems.
## Step 3: Activate Brewfather and change the settings
On the "Service" page, the "http" service must be activated.
The Server and Port fields in the http field must be filled in as follows.\
The URL must be copied from the Brewfather interface. (The last step of the Brewfather setup)

### additional settings
In order not to consume too much power, we would turn Bluetooth off when it is not needed. It was documented here:
{% content-ref url="../add-bluetooth" %}
[add-bluetooth](https://instruction.hydrom.io/add-bluetooth)
{% endcontent-ref %}
In order for the Hydrom to transmit the data reliably, a DeepSleep time must be set. This is documented on this page:
{% content-ref url="../other-settings/enable-deepsleep" %}
[enable-deepsleep](https://instruction.hydrom.io/other-settings/enable-deepsleep)
{% endcontent-ref %}
### Save Settings
Saving the data is important because it is the only way to connect to the service after waking up from DeepSleep.

You can check whether the saving was successful by looking at the settings file at . to check if the save was successful. This file is the permanent memory of the Hydrom.
A second way to check the saving is to reload the page (all modern browsers offer this Feature). If the properties are then reloaded, the hydrom has accepted them, otherwise the old settings are reloaded.
### Send Test-message
By activating this button, you can check whether the Hydrom has a connection to the service and to the individual parts of the service. If you now click on "Save", the set services are executed once and the page is reloaded. On the new page you can see whether the servers are accessible and the ports are open.

### activate DeepSleep
Activating DeepSleep is mandatory for the hydrom to be able to send data. If DeepSleep is activated, the hydrom wakes up after the set time and sends the data to the set service. Afterwards, the hydrom goes back to sleep and waits for the new service.
{% content-ref url="../other-settings/enable-deepsleep" %}
[enable-deepsleep](https://instruction.hydrom.io/other-settings/enable-deepsleep)
{% endcontent-ref %}
{% hint style="success" %}
To ensure that the device sends measured values to the Service in the set interval as intended, the Hydrom must be put into deep sleep.
There are two ways to put the Hydrom into deep sleep.
Turning the ***power switch off and on*** is the easiest way to put the Hydrom into deep sleep.
The alternative way is to put it to sleep ***via the UI***. To do this, open the navigation bar and go to the "DeepSleep" tab.
{% endhint %}